How do I schedule different Leads to send emails on different date ?
When you want to schedule emails to go on pre-determined date for individual leads so that all leads won't be scheduled on single day.
Knowledge Base for 7Targets AI Sales Assistant aka Virtual Sales Assistant
Look at the video below which explains the how to add more information in the email.
Ideally, the assistant generates dynamic emails everytime. But many a times we want to add some specific information which should be added to all the emails, and also don’t want the assistant to change it.
This information can be a success story, about some award you won, the customers you work with etc. It establishes level of confidence in the people who are going to receive the emails.
One of the many features in 7Targets is that you can add this additional information which will not be changed unless you edit it.
Follow the steps below to add more information to the emails.
Sign in to your account.
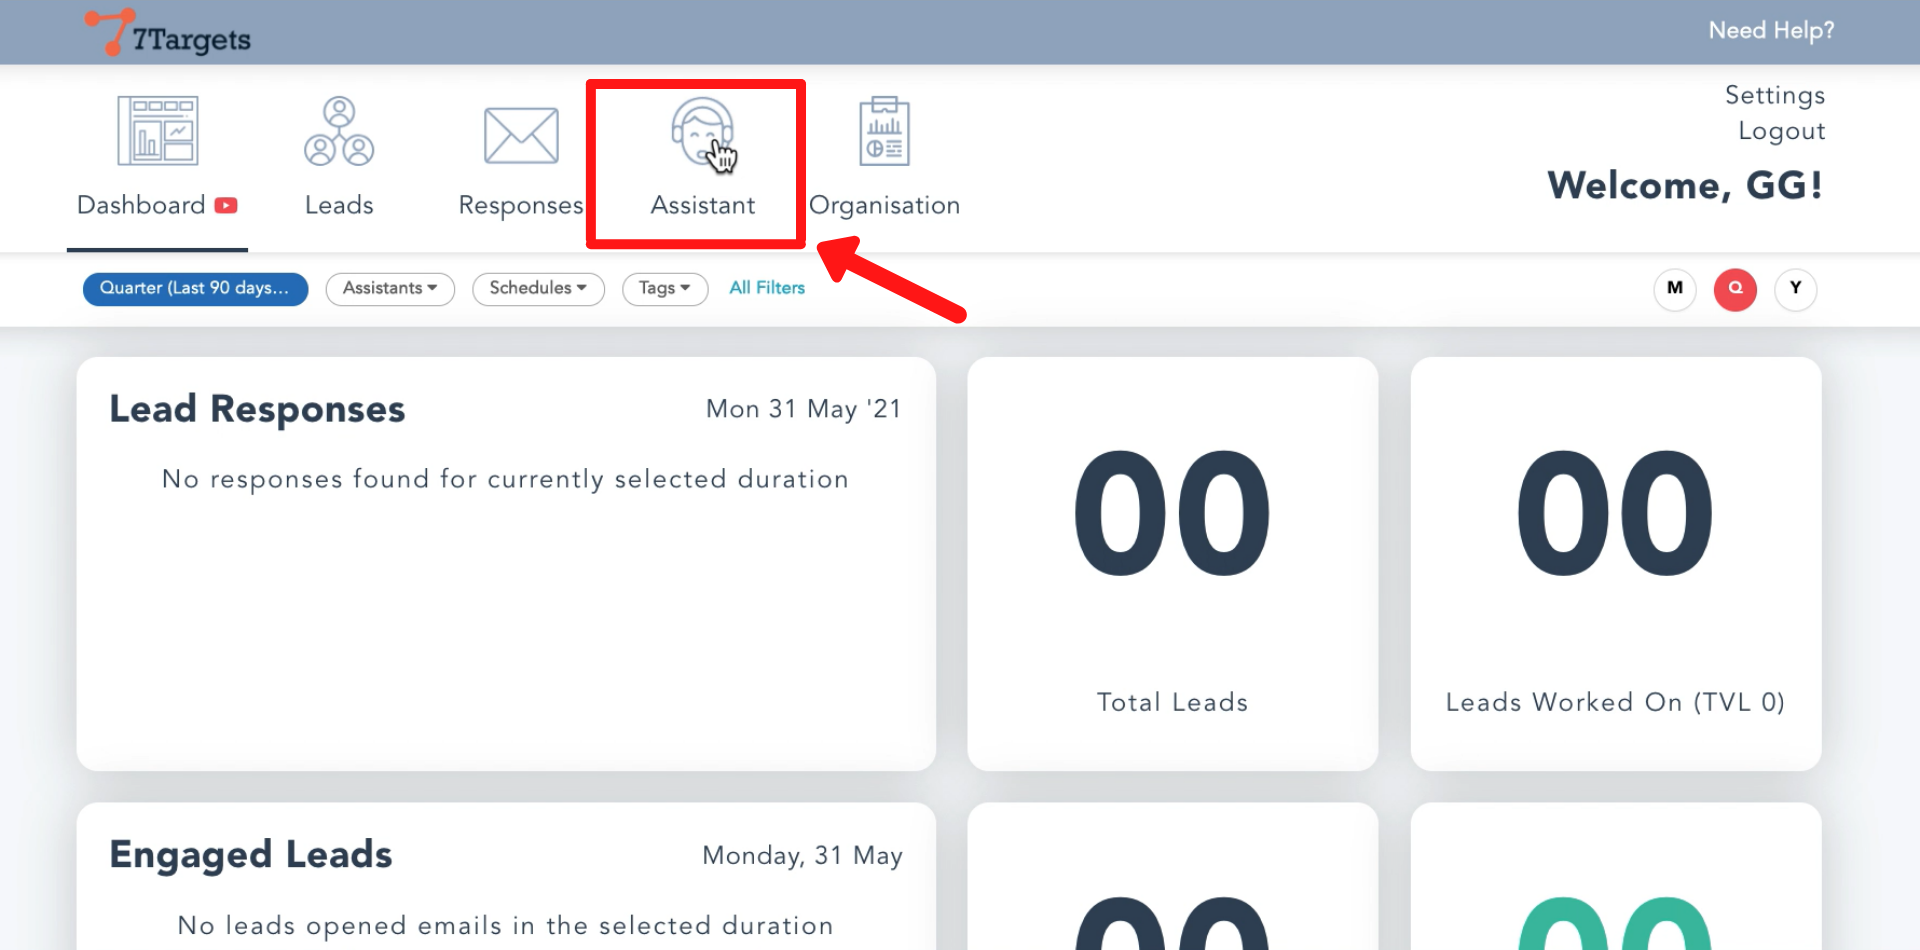
Click on the ‘Assistant’ tab.
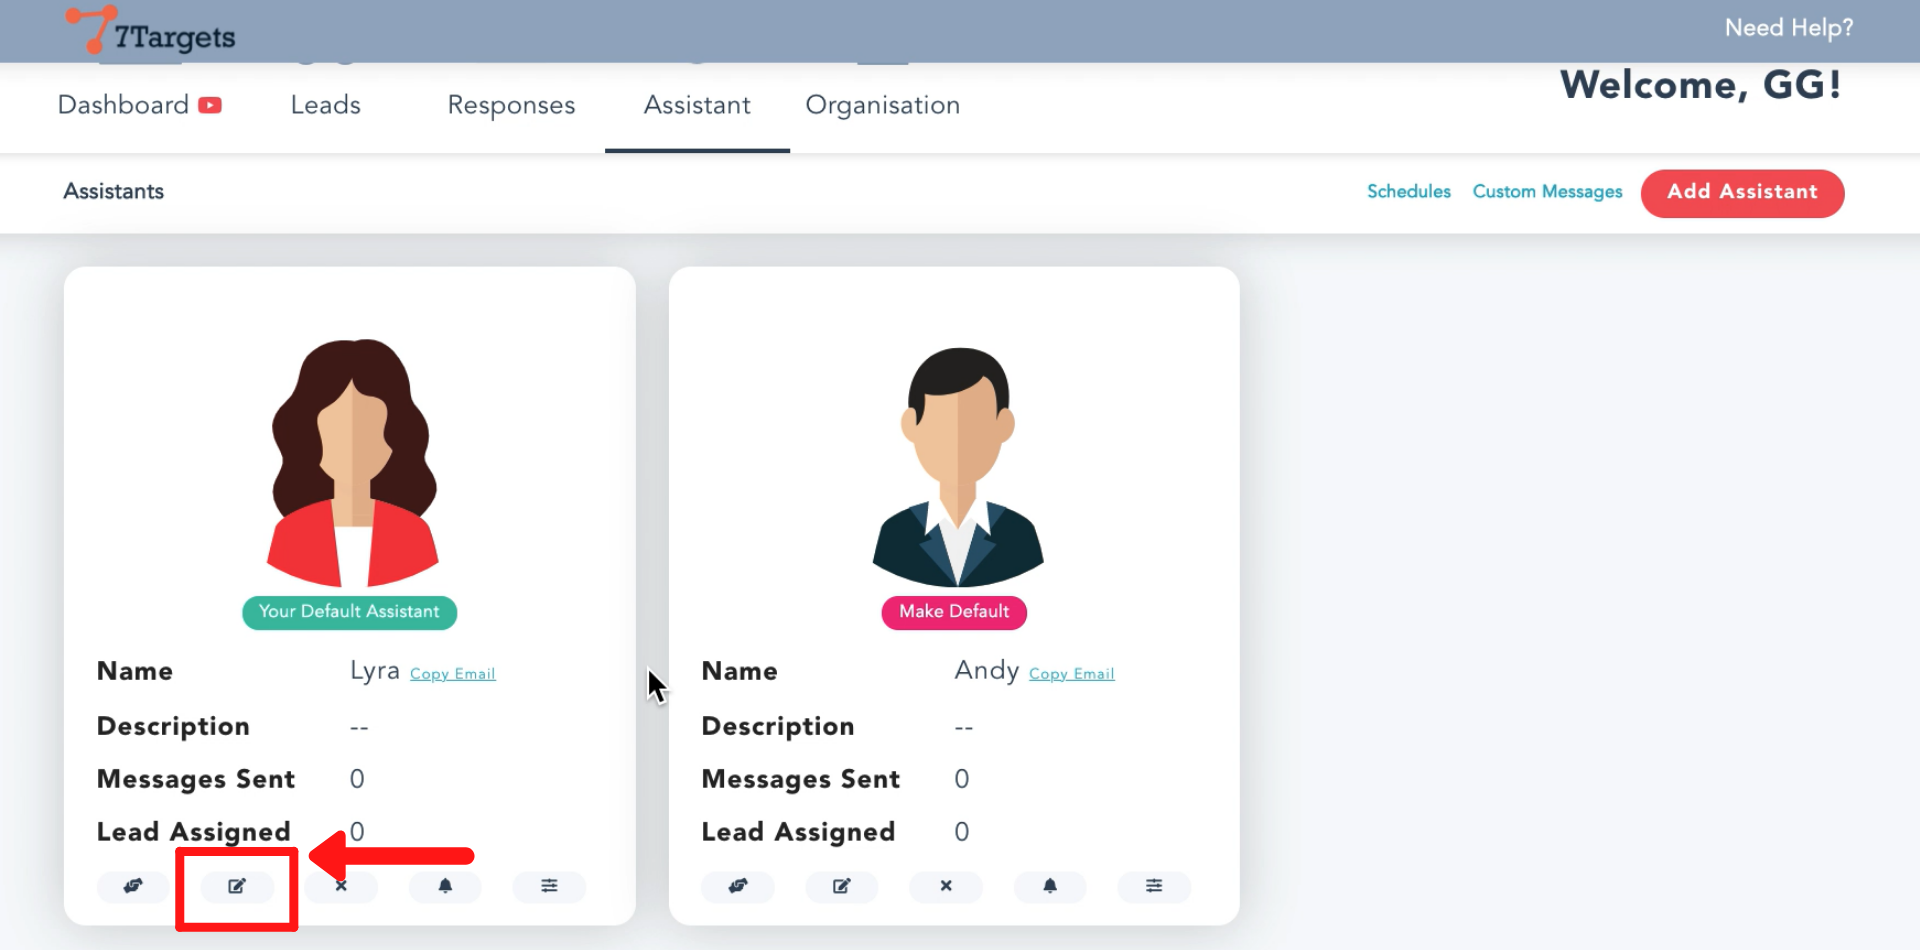
Click on edit assistant as shown below.
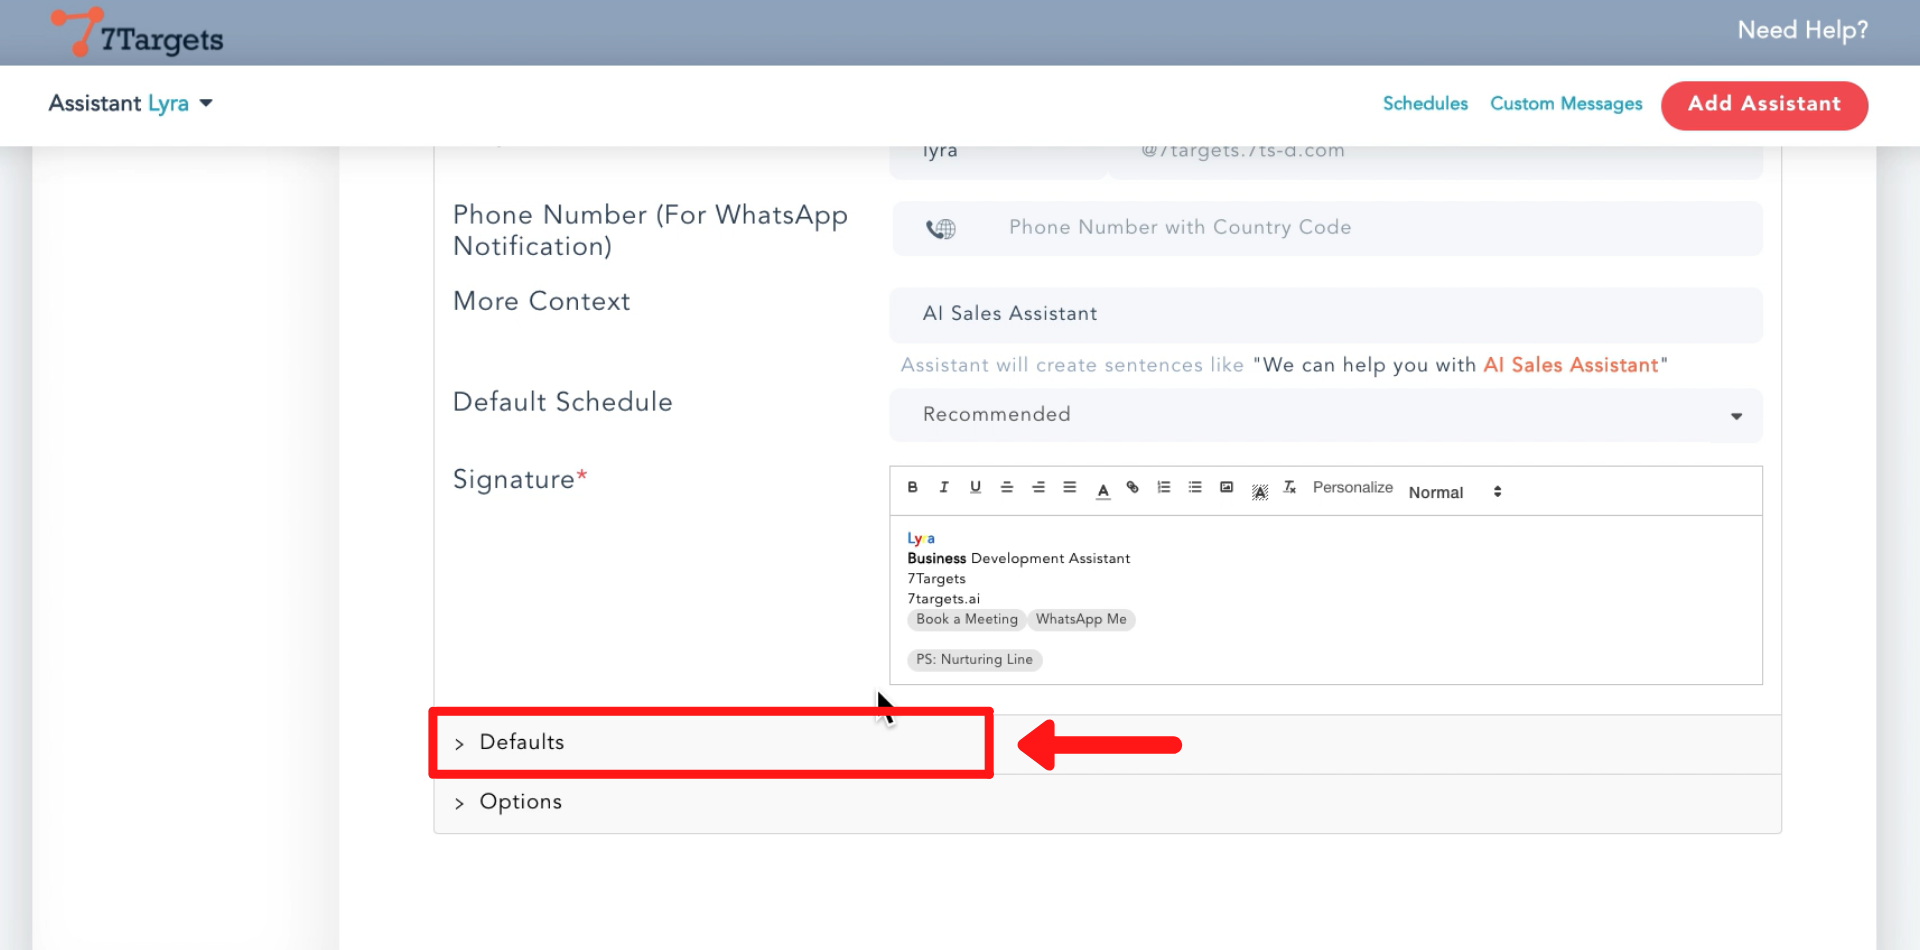
Scroll down and click on the ‘Defaults’ tab.
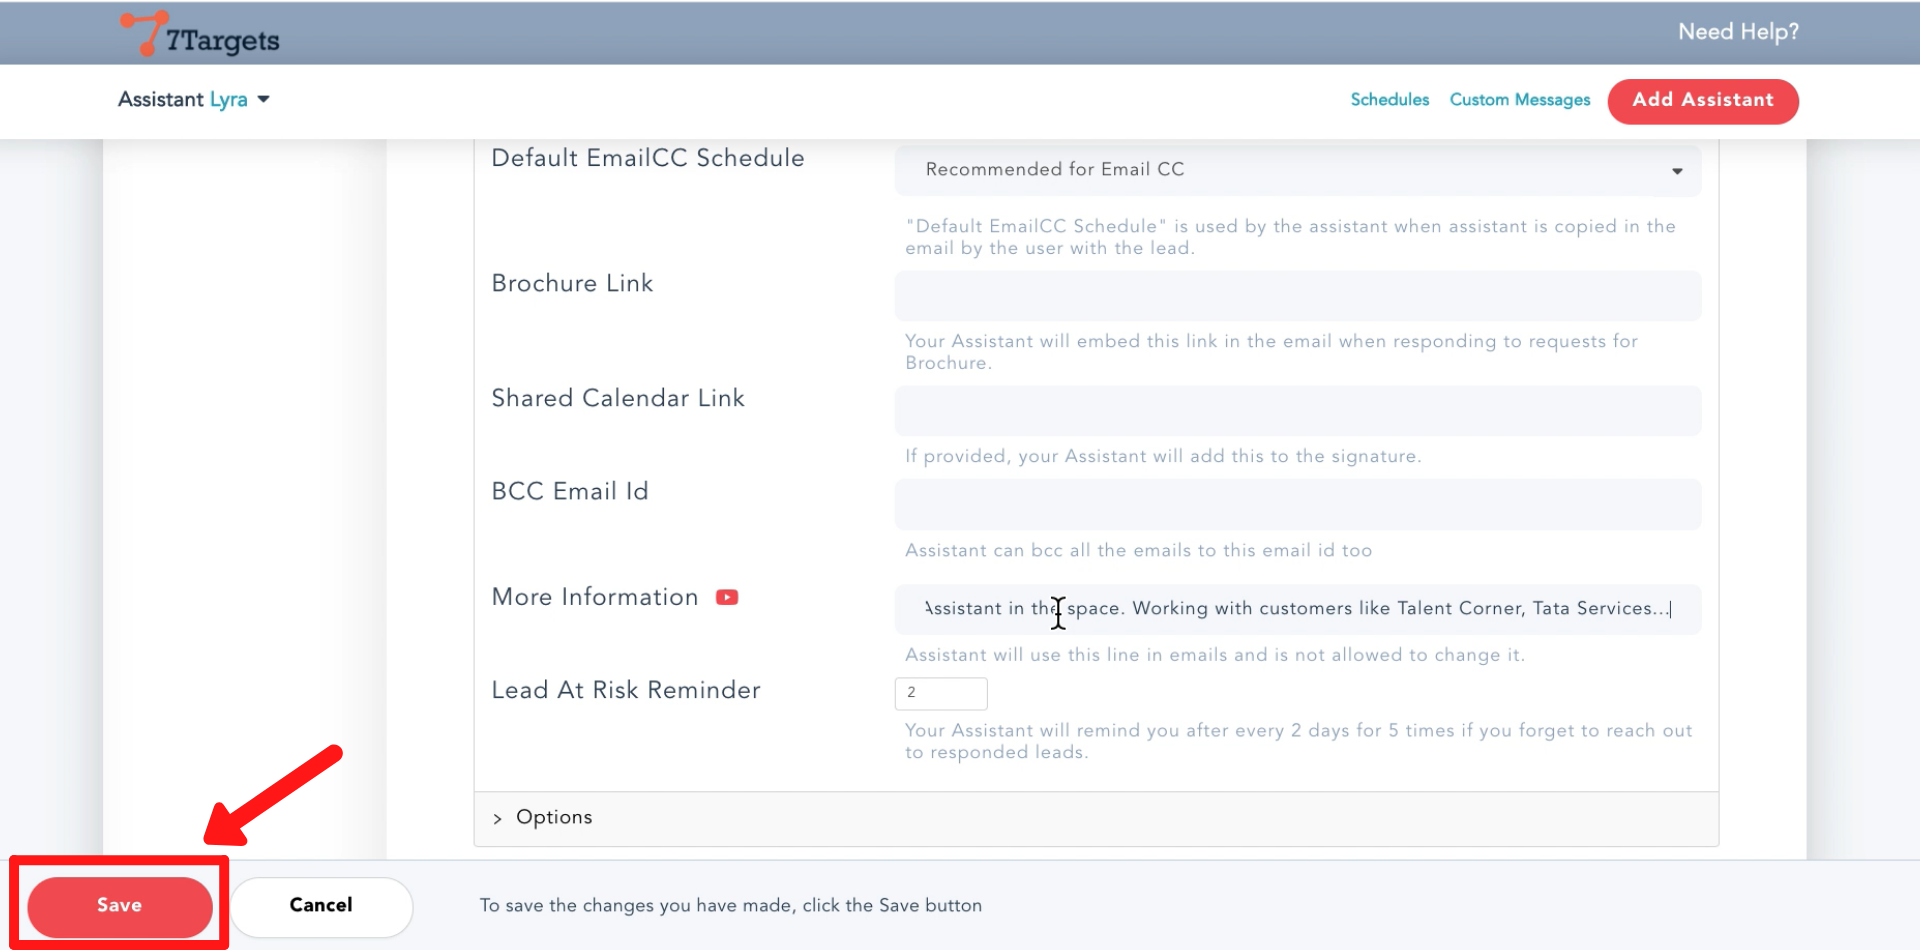
You can see ‘More Information’ field. Here, in this field type the additional information. This information will be used by the assistant without any changes in all the emails.
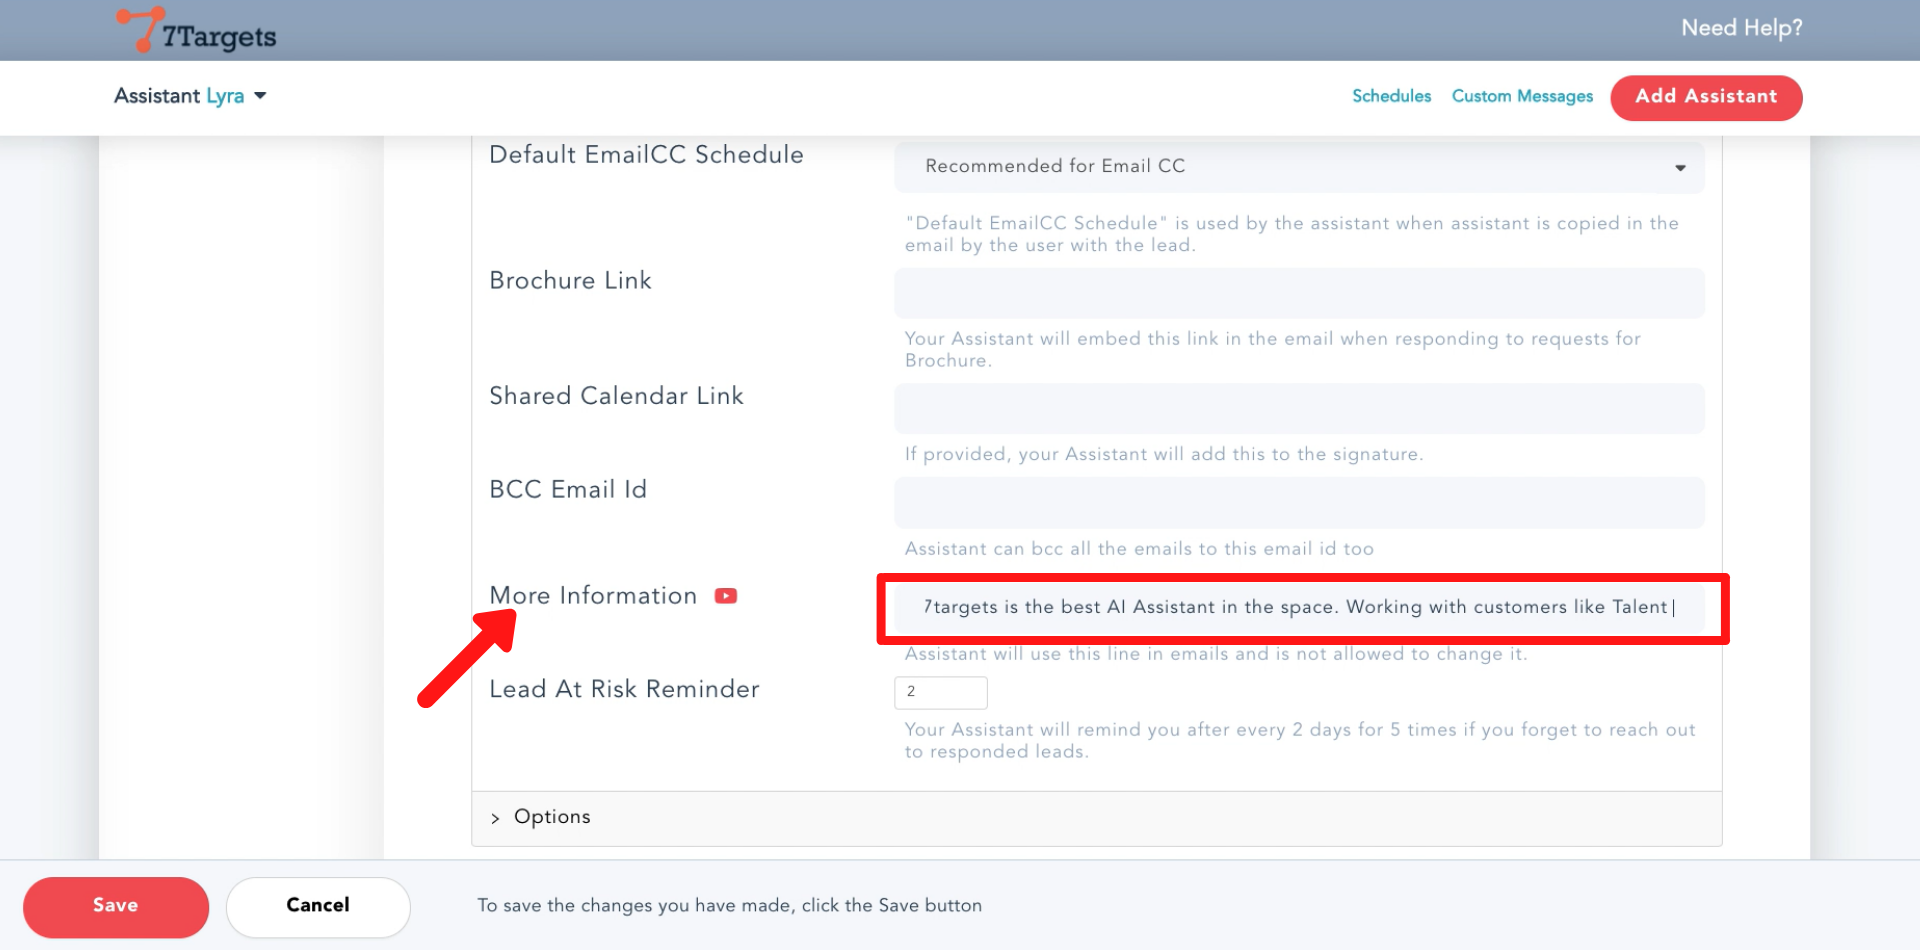
Click on the ‘Save’ button.
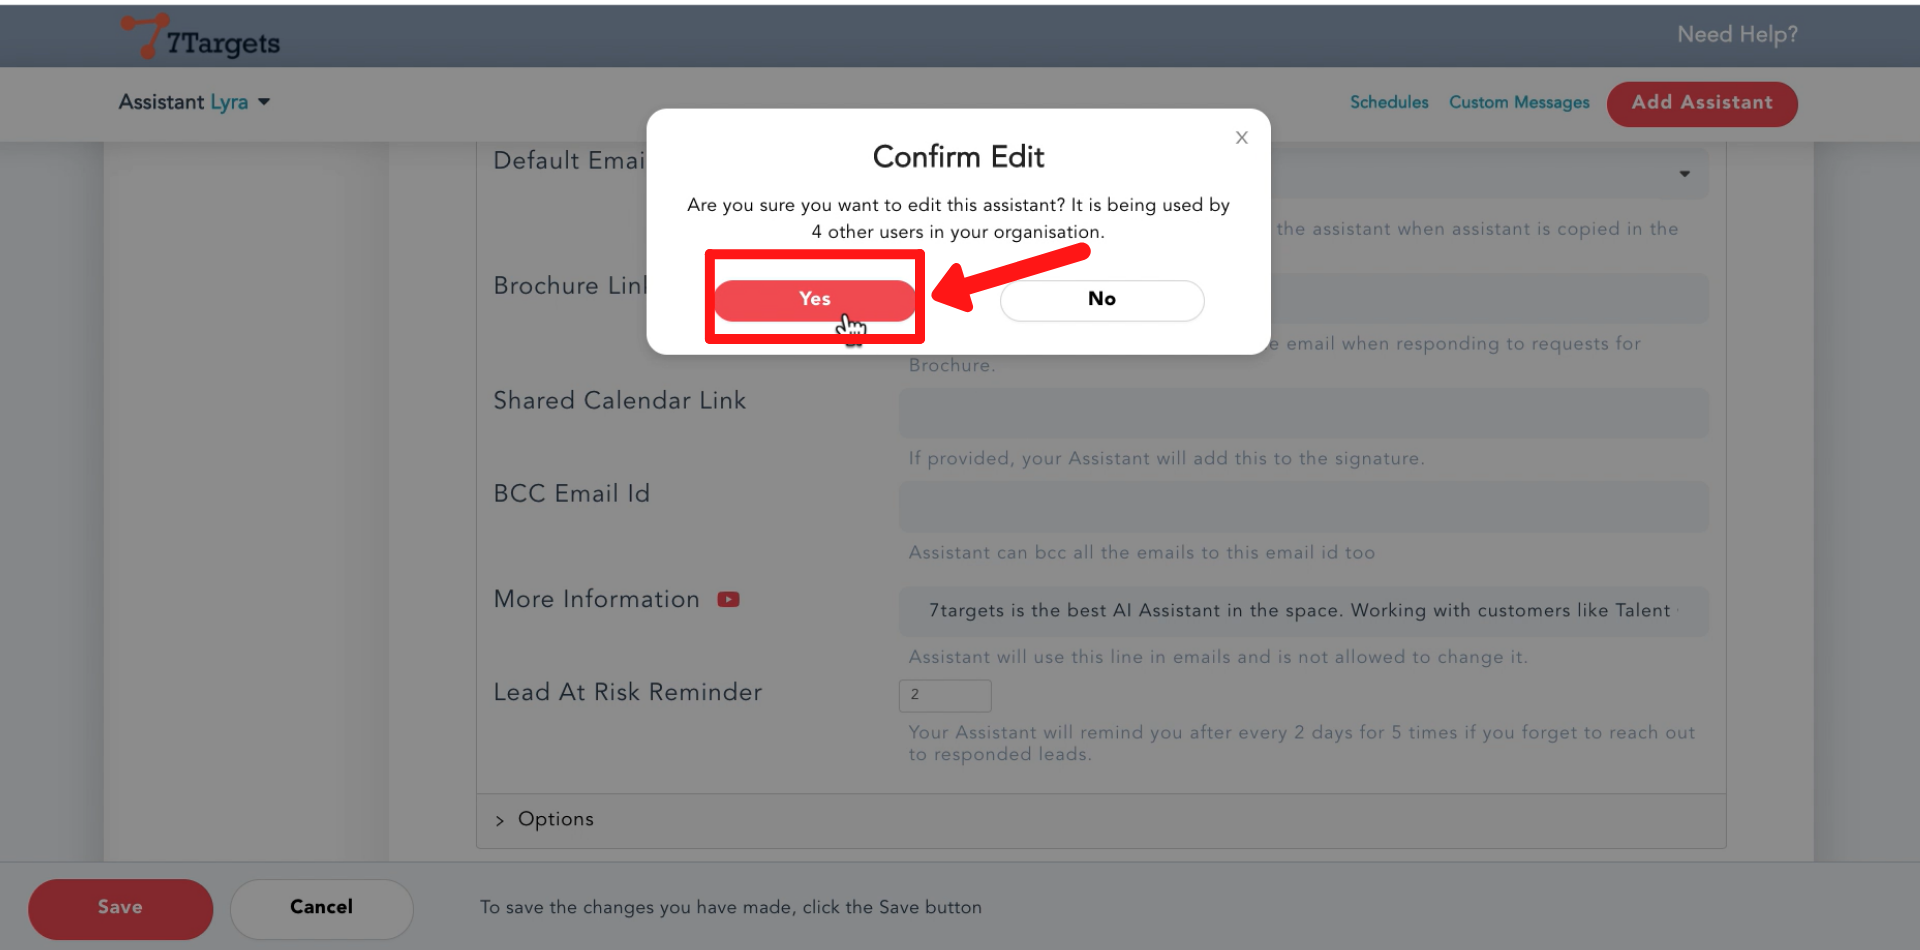
Then, select the ‘Yes’ option and you information will be added.
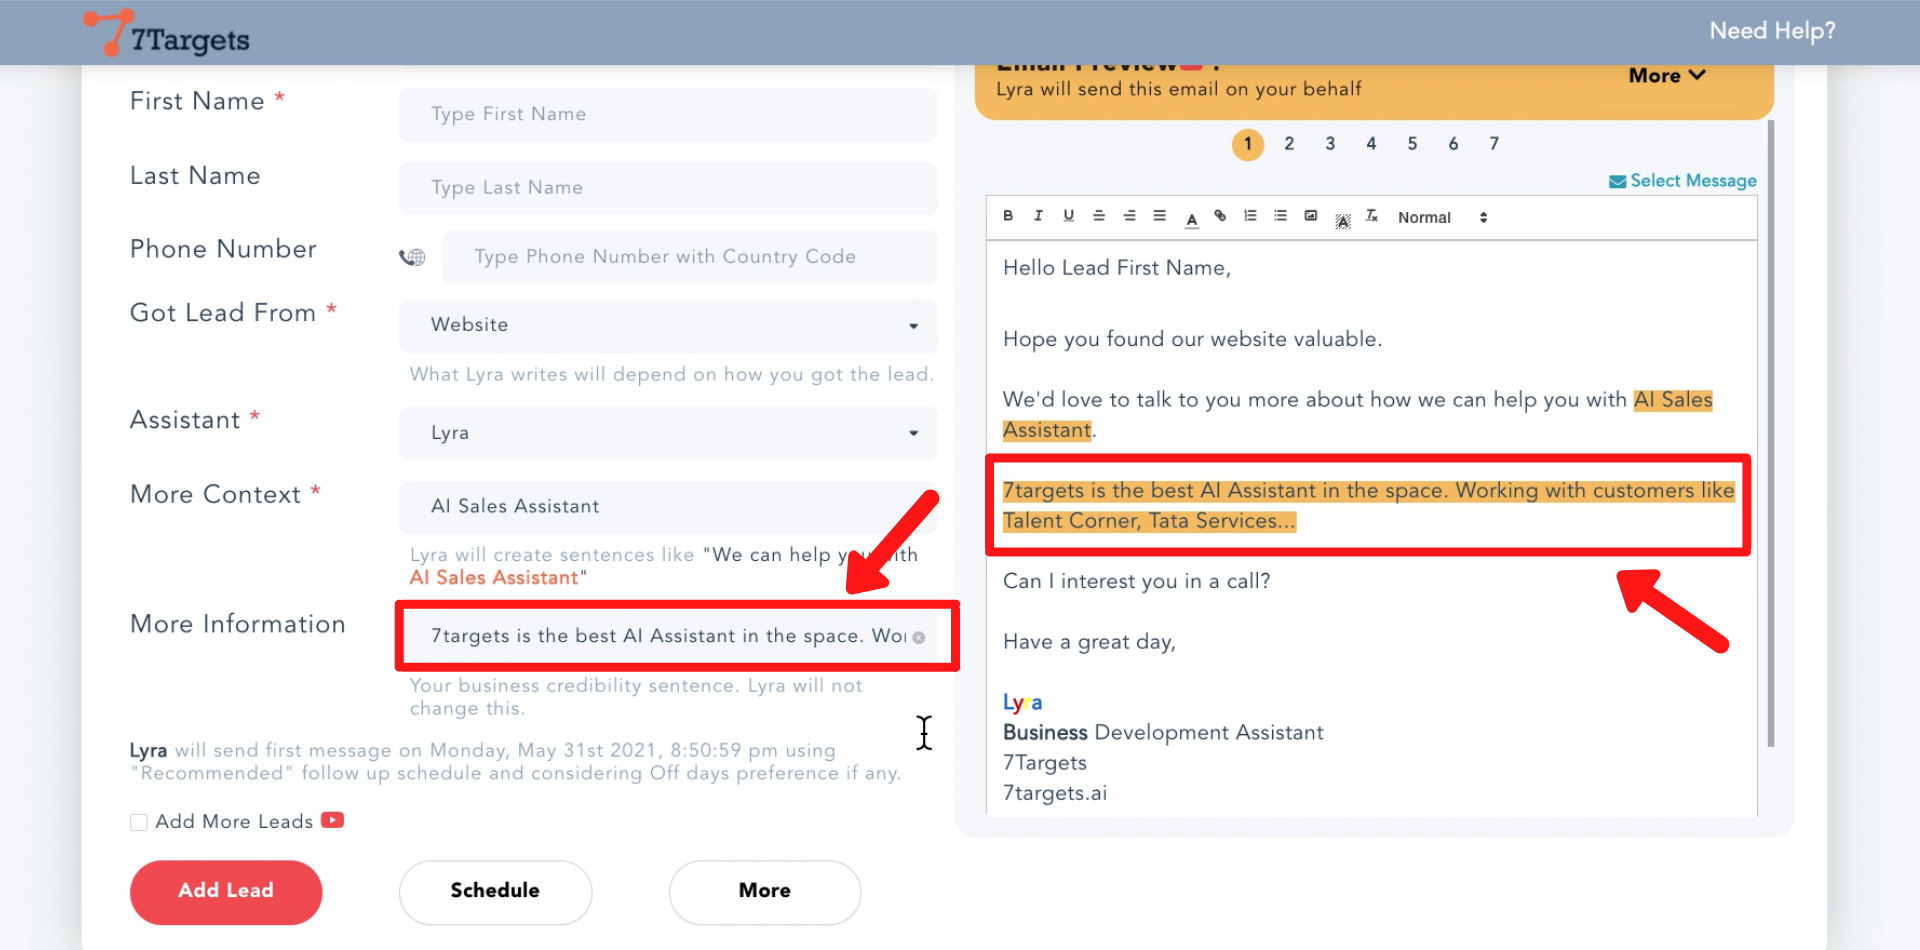
Now, if you upload the leads and assign them to the assistant. You will see that the additional information you have added is used as it is in the emails.
If you wish to edit this information while adding leads, you can do it in the ‘More Information’ field as shown.
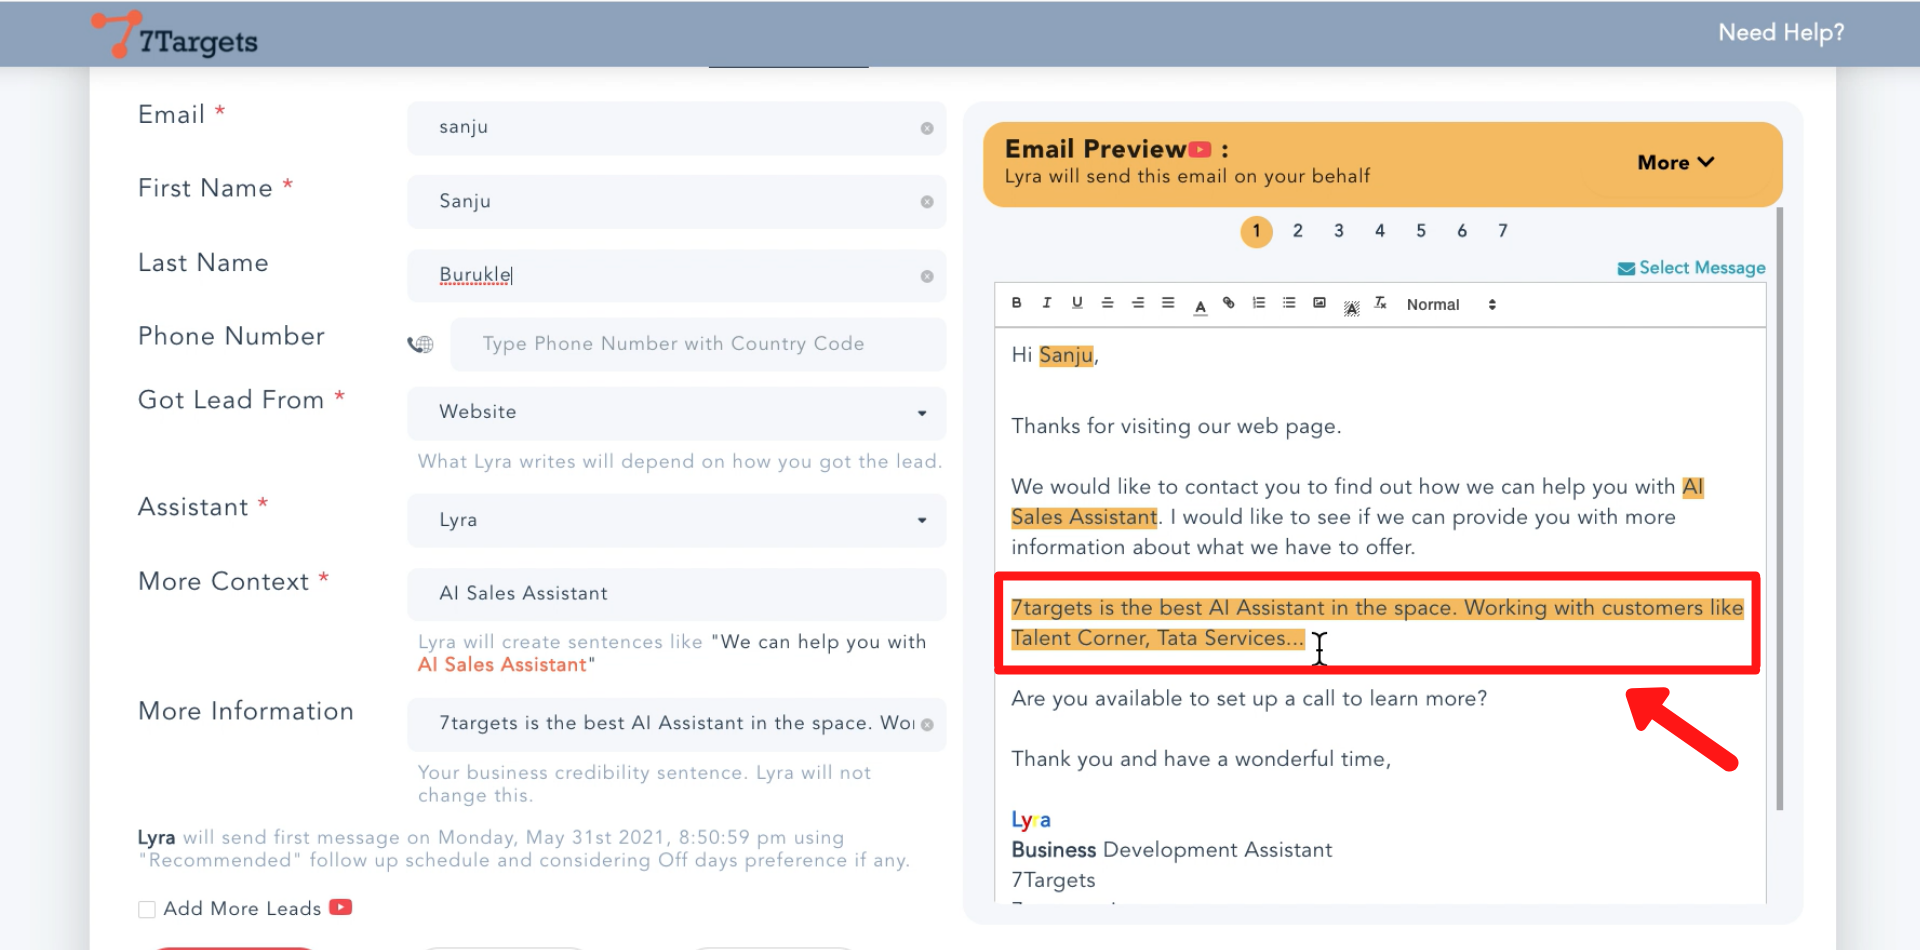
Observe that when you add the details of the leads, in the preview section the emails changes except the informaton you have added.
If you have any further doubts you can directly mail us at info@7targets.com.